CARDS COMPLETED THIS WEEK


Hello everyone,
Back again with some cards I completed this week.
A baby card and some birthday cards I had to make for this month.


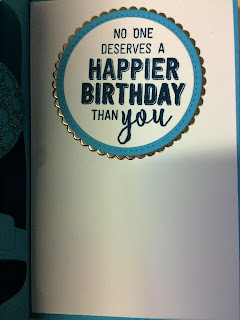
 This is a birthday order card I had to make
The products used were:
#140622 Numbers framelits
#140621 Bloomin' Heart thinlets
#141493 Petal Burst Embossing Folder
#132622 Gold Glimmer Paper
#142753 Balloon Pop Up dies retired
#142823 Balloon adventures stamp set retired
Bermuda bay glimmer paper retired
#138728 Wild About Flowers stamp set
#108598 Tempting Turquoise A4 cardstock
#145372 Stitched shapes dies
#141705 Layering circle dies

 Baby card
#141421 Flirty flamingo A4 cardstock cut @
8 1/2" x 5 7/8" scored at 4 1/4"
#131287 Blushing bride cut @ 5 5/8" x 4"
dsp so in love retired cut @ 5 3/8  x 3 7/8"
#144235 Ombre ribbon Calypso coral
#141672 Very Vanilla 1/2" Lace trim
#141859 Baby bear stamp set
inks used were:# 3144084 Powder pink, #141397 flirty flamingo, #126950 Rich Razzleberry


 Base card #144248 A4 cardstock Fresh Fig cut @8 1/2" x 5 1/2"scored @ 4 1/4"
Dsp #144131 Fresh florals cut @ 5 1/4 x 4 1/8"
another piece of dsp cut @ 4 1/8" x 1 3/4 "
#106549 Whisper white cut at 3" x 3"
#140622 Numbers framelits
#140653 Number of years stamp set
#141710 Banners for you
Ink colours used : ##126959 Wild wasabi, #144082 Fresh Fig
#144220 Rhinestone basic jewels
Retired white satin and sheer ribbon.
#141767 Floral Phrases stamp set.
 I do hope you like these cards
Please leave a comment and let me know what you think
Thank you for stopping by.
Sorry I can't say who these cards were for except they were for relatives and friends.


your photo name

NEW CATALOGUE LAUNCH

Well hello everyone, so excited to be here today with some great news.
Seeing as I have been so busy of late, I have decided to do My New Catalogue launch at the Haven Market on June 3rd 2017.
 So save the date, as there will be some awesome products for you to see as well as some give away's and you can play with some Brand new products as well to make and take away with you.
Haven't quite decided on what the give away items will be yet. They maybe some retired items or they may be some new items, it will be a surprise package I think at this stage.


This is the promotional catalogue cover we are allowed to share with you all.
The new catalogue is full of some very awesome products this year and the New in-colours are so vibrant, that they have to be seen in person to really appreciate their beauty.
The new DSP papers are the best I have ever seen, I will have some at the market for you to view.
Some new DSP on it's way order in.


If you missed out on the Eastern Palace Suite bundles (available to 31 May 2017) i have some good news, they are available to order in the New Catalogue from 1st June 2017 but not as a bundle. 
I have had some great fun with the premiere bundle as You can see from previous posts here.

This is all for this post but stay tuned as I will be doing a later post tonight as well.
your photo name

global design entry GDP#087

Hello everyone,

This is my global design entry for this week.
GDP#087

The theme challenge was cooking baking and making.


Base card was Pumpkin pie 8 1/2" x 5 1/2"
Whisper white cut @ 4 x 51/4"
Sponged top 3/4 in Lemon lime twist (New incolour)
bottom 1/4 section in Sahara sand
Stamp sets used were
#143660 Birthday Delivery
#142933 Perfect Mix (soon to be retired)
Cut a table out of Chocolate chip cardstock and a tablecloth triangle Bermuda bay DSP(soon to be retired)
I stamped images , coloured them in using Bermuda bay bay & daffodil delight watercolor pencils,  inks colours were mint macaroon, watermelon wonder, Sahara sand, real red powder pink blushing bride, and Flirty flamingo, fussy cut and die cut .
Sentiment was stamped on Whisper white and then used the 2nd smallest stitched square die
the pumpkin pie scallop square was number 3 from the squares die set.

Hope you like it.


your photo name

MORE EASTERN PALCE PROJECTS

Hi everyone,
Today I cased a card done by Sandi MacIver Here is the link to her tutorial..https://www.youtube.com/watch?v=AnKBtx2tSnI

 I loved the colour combination of her card and here is my version.

Here is the second one I did
Base card is #131286 A4 Bermuda Bay cardstock measuring 11 x 4 1/4" scored @ 5 1/2"
#131292 A4 cardstock Soft Sky 5 1/4" x  4"
#143275 Eastern Medallions Thinlets
#145372 Stitched frames circle no.1 &no. 2
#132622 Gold foil
#109129 Gold embossing Powder
#143675 Eastern Beauty stamp set
#134583 1/8" gold Ribbon approximately 32" in length
#144150 Eastern vinyl stickers
#144154 Mini tassels assortment
#102283 Versa mark
#129056 Heat tool
#110755 Multi purpose Liquid glue
#104430 Stampin' Dimensional s

1. Take your soft sky piece of cardstock and your medallion centering it left to right and from top approximately 1/2" down from top, run through big shot using magnetic plate or thin die adapter plate or your base plate and precision plate which ever method you prefer.
2.Then take a piece of gold foil approximately 2 1/2" square and using 2nd stitched circle die run through big shot.
3. take a scrap of soft sky approximately 2" square and using your no. 1 stitched circle die run through big shot.
4. using a scrap of Bermuda Bay card stock approximately 2 1/2 "square attach your flower vinyl sticker and using flower die and outer die cut your flower out using big shot ensuring you align your dies correctly over your flower. All your die cutting is now complete.
5. take your piece of soft sky cardstock you cut the medallion out of and rub over with your embossing buddy take your versa mark and the star design stamp and start stamping randomly over card. then dip in gold embossing powder or just sprinkle over, heat set with heating tool.
6. using some fast fuse or glue dots on back of card at top take your gold 1/8" gold ribbon and wrap around card twice then thread on your gold tassel and tie a bow.
7. using dimensionals place card to base card then glue your gold piece onto medallion centering add flower using dimensionals centering.
8. using embossing buddy versa mark and thank you stamp, stamp sentiment dip in gold embossing powder and heat set.
9. sponge edge with Bermuda Bay ink then using gold wink a Stella carefully add to outer circle or alternately paint on versa mark and and dip in gold embossing powder if you do not have a gold wink a Stella pen.
10. adhere to card using dimensional add a straight vinyl sticker to the bottom of your soft sky layer.
I put a layer of whisper white same size as soft sky inside my card and added a 1/4 inch of gold foil.
Your card is now complete.


My third card today is this one. I used the lovely new colour of Lemon lime twist cardstock for this one as my base card cut @4 1/4 x 8 1/2" scored at 4 1/4
Dsp from Eastern Palace suite cut @ 4" x 4"
Bermuda bay card stock cut at 3 1/2" x 3 1/2
 Soft sky 3 1/2 x 3 1/2"  for medallion
Tranquil Tide cardstock scrap for flower medallion

1.Burnish and fold your base card then adhere dsp to card base.
2. stamp sentiment in dapper denim ink"a note for you in each corner.
die-cut your medallion and flower snipping out your medallion to give you shape in picture.
3. sponge edges in Bermuda bay ink and wink -a -Stella same as previous card adhere these pieces with dimensionals.


My Final project for today is this Eastern Palace suite medallion card. Sorry should have rotated this one for you.

What you need for this card is one of the very vanilla note cards as your base card which are free with  the Eastern Palace starter bundle. #147196 for the month of May.
After 31st of May you can order the items separately.

Eastern medallion DSP measuring 2 7/8" x 3 3/8"an another design cut @ 2 1/8 x 3 3/8
Gold foil 3 1/2" x 3 1/2' square
Lemon lime twist cardstock cut @ 3 1/2 x 3 1/2"square
Gold embossing powder
Eastern Medallion  thinlet dies
Eastern vinyl stickers.


1. adhere dsp to base card and add straight edge sticker to edge of where first dsp ends.
2. die cut your lemon lime twist medallion using only one die and snip out. Do the same with gold foil but this time use same medallion and second die in from sunflower medallion (that is what I call that one) run through big shot together to get the pictured gold medallion.
3. run your embossing buddy over gold medallion and using versa mark and the enjoy today stamp, stamp and sprinkle with gold embossing powder.(be aware that this may slip so be very careful when stamping. Next heat set then repeat process using the circle of dots stamp. I find it easier to do this is two steps you may prefer to do it one step, the choice is yours.
4. add dimensionals to back and adhere to to card front.

These are my projects for today please leave a comment as I would love to hear what you think.


your photo name

More Eastern Palasce cards

three variations of Eastern Palace cards


If you would like instructions for these cards.
Email me at pforward2@optusnet.com.au and I can Email you the pdf.
your photo name

ANYONE INTERESTED IN THIS WORKSHOP?

EASTERN PALACE SUITE

Hello everyone,

A few more samples using this gorgeous suite.

Will be making these in class in May the 3rd Saturday 2017.
Stay tuned as there will be more samples to come of this fantastic suite, I just can't get enough of this.

I may even plan a full day class of this set yet as I have so many ideas to share with you.
If you would be interested just drop me an email as I would need a certain number to make it viable.

I would just be supervising the workshop and helping as needed.

Those who purchase the beginner bundle will need to pay a $20 fee for their class. This is still half my normal fee for classes.

your photo name

EASTERN PALACE SUITE BOX

Hello Everyone,

Trish Forward here with another project to share with you today.

I am so excited to introduce you to a fantastic pre - release of the stunning "Eastern Palace suite Bundles" that will be available to customers  from the 1st May - 31st May 2017.


This is just a stunning suite and I have had so much fun playing with this.
You really need to order these bundles as they are incredible.
There are two bundles available to customers,

I will see if i can post these here today.
 Didn't seem to want to co-operate with me today so posted it on my Facebook page for you to view.

I will also be emailing these out to customers today as well.

So if you live in Australia and don't have a demonstrator and want to order of have a copy of these two incredible bundles just email me today and I will send you a copy.

I have been so busy since posting here last that I just have to share with you what I have been up to before I share the project with you today. I will try and keep it brief for you.

Attended onstage in Sydney. Awesome came home with lots of free goodies there.

Attended a stamping day with a lovely lot of ladies in the lovely Pam Jorgenson's team and downline team members. What an incredible day that was. Will share our projects at a later date. A big thank you to Maxine, Pam and Shelley for sharing her onstage display projects with us.

Attended a market day in Horsham. great day.

Now onto our project today.

EASTERN PALACE SUITE BOX


Products used:

#147209 Eastern Palace premier Bundle


Here is the digits and stuff to complete this project


Box base:
A4 Cardstock Dapper Denim 8 1/4" x 8 1/4 " scored @ 2" all 4 sides

Box Lid:
A4 Cardstock Dapper Denim 8 5/16" x 8 5/16" scored @  1"and 1 15/16" all 4 sides

Finished box measures: 4 1/4" x 4 1/4"


Eastern Palace DSP for sides of box base 4" x 1 7/8" Note: Be sure when cutting this that the pattern is going in the right direction for this project.
Eastern Palace DSP for sides of box lid 7/8" x 4 1/8"

Layers for top of box
Very vanilla A4 thick 3 1/2" x 3 1/2"
A4 cardstock Tranquil tide 3 3/4" x 3 3/4"
A4 Cardstock Fresh Fig 4" x 4"

To Assemble your box
Take your piece of very vanilla cardstock measuring 3 1/2 x 3 1/2" and layer your thinlets using the medallion flower outer petal shape and the 2nd die in from outer thinlet, centering your dies on your piece of cardstock and run through your big shot using the base plate and precision plate or the thinlet die adapter plates,either way will work.
Fold and burnish all scorelines on both base and Lid pieces or you can work on them separately if you wish.
You can adhere your dsp pieces now if you are confident enough to do it or you can cut up your scorelines as follows:
On the box base base cut and wedge to scoreline on left hand and right hand then working on opposite side do the same. Put tombo glue or fast fuse on all four flaps and fold up sides of box to line up and form corner of your box, repeat until all four corners have been adhered. Now adhere your dsp for those less confident to do so in previous step.

For your Lid:
Cut up first and second scorelines to the 2nd scoreline and take out a small wedge on either side on the right hand side, do the same for your left hand side. Then turn your card to the opposite and side and repeat the previous step. Now take a small wedge out of the longer pieces either side just to the first scoreline. These will be turned in later to reinforce your box lid.
Next, add tombo glue or fast fuse to the tabs and fold in and adhere to inside of sides of your box making sure you line up the corners. Repeat for all four corners.
Next add tombo glue or fast fuse to your longer pieces and fold inside your box lid, this will reinforce your box lid. Now you can add your dsp pieces for those less confident to do in the previous step.
Your box is almost complete. Just a few more steps to go.
next take your 4" x 4" piece of Fresh Fig cardstock and adhere to your box lid, centering it.
Next place dimensionals on your 3 3/4" x 3 3/4" piece of Tranquil Tide cardstock and place on top.
For the next layer of very vanilla we are going to do some stamping on here first.
Stamp sentiment in centre of flower "enjoy today" in Dapper Denim ink, then stamp the circle of dots in Fresh Fig ink next stamp stretched scrolly heart design in Tranquil Tide ink. (this was the best way I could think of describing this stamp.)
Next add some small gold stickers to the corners.
Next place dimensionals on back and adhere to Tranquil tide layer. Using glue dots adhere tranquil tide tassels to top, take a piece of gold metallic thread and tie double bows to gold rings at the top of tassels. Now make a small gold bow from 1/8" gold ribbon and adhere with a glue dot to bottom section of top Layer Your box is now complete. Yeah!!!!!!!!!!!!!!!!!!!!!!!!!!!!!!!!!!!

I also made other variations as well.
See photos below for those.
won't let me post images here so will put in another post.

I will be doing  video tutorials next week for this and the matching card. I think I will do it in two parts as it would make it a very long video if I did it all in one and I will also show how I did the other variations for the top as well.

I will post matching card next week too.

Sorry this post was so lengthy but I have been away and wanted to share my news as well as the directions for the box in as much detail as I could. For future posts like this I will try and do the videos first then just give the measurements and stuff you need to complete and you can refer to the video for assembly.

Bye for now.
your photo name
My entry into global design project#GDP080
we were lucky enough to case the ever popular Louise sharp this week.


Base card Sweet sugarplum cardstock
8 1/2" x 5 1/2" scored @ 4 1/4"

 Succulent DSP layer 1 Cut @ 4" x 5 1/4"
Succulent DSP Layer 2 Cut @ 3 6/8" x 5"

Whisper white cardstock for tag.
Tag cut @ 2" x 4 1/4"  then punched using scallop tag topper punch.

Beautiful you stamp set used stamped once on tag and once on checked succulent DSP in archival black ink.
Then fussy cut dress portion and hat portion and paper pieced onto image on tag.
Whisper white cardstock used to cut succulent flower, using co -ordinating thinlets then sponged with sweet sugarplum ink. I then shaped and adhered flowers together using Tombo glue.

The tag was sponged with sweet sugarplum ink as well using a sponge dauber.

I tied some sweet sugarplum ribbon to tag and added dimensionals on the back to give the tag a bit of dimension on the card.

The photo looks like I used another colour on the flower but it is a shadow.

I do hope you like it.


your photo name
Hello everyone,
This is a card I made a few weeks ago and forgot to share with you all.
So here is the photo of the finished card.


Here are the digits and stuff you need to complete this card:

Card base: #138344 Mint macaron cardstock 8 1/4 x 5 1/2 scored @ 4 1/4" (21cm x 14 cm scored @ 10.5cm)
1st Layer is #138343 Tip Top Taupe 4" x 5 5/16" (10.2 cm x 13.5cm)
2nd Layer is #142778 Succulent garden DSP 3 13/16" x 5 3/16 (9.7 cm x 13.1cm)
inside layer is #106549 Whisper white A4 cardstock 4" x 5 1/4" (10.2cm x 13.3cm)
for window #138344 Mint macaron cardstock 3 3/4" x 3 1/4" (9.5cm x 8.3cm)
back of window #142778 Succulent garden DSP 3 7/16" x 2 1/2" (8.6cm x 6.3cm)
Banner piece is #138343 Tip Top Taupe 1" x 3 1/2 " (8.6cm x 6.3cm)

Stamp set used #143637 Beautiful You
#3149666 Hearth and Home Thinlets
#142757 Succulent Framelit dies 
#142992 Oh so succulent stamp set

Inks used #141395 Sweet sugar plumb
Archival ink #140931 Basic Black

Stamp lady on whisper white card and fussy cut adhere to dsp
to the left side approx 1/4" in and approximately 3/4" down
I had to do this as I wanted the dsp to be part of the wallpaper. If I had stamped the image straight onto the dsp the pattern would show through which would have spoilt the the look of the card.
Stamp the lady 2 more times on the sweet sugar plum checked side of the DSP and fussy cut the ladies dress coming in just inside the ladies dress on the left side. It is OK that the black lines are cut off as you will be adhering this on top of your whisper white lady. Fussy cut the hat as well I just cut the upper brim and cut off the the lower part. If it bothers you you can colour the inside of the brim but I think it is fine as is.
Adhere both pieces to your whisper white piece and you can stamp the inside of your card with lady in lower left corner but only about 3/4 of the lady. cut your second dsp check pieces and adhere to inside of card image and trim.
Trim your dsp if necessary to fit behind window. I used a pencil to outline and cut about 1/16" inside the pencil lines.
Next add Tombo glue to back of window frame and adhere over backing piece with lady on.
This is what it should look like, centre picture

Adhere your layers to card base and add your whisper white piece to inside of card.
Next stamp your banner with celebrate and fish tail by snipping centre and cutting diagonally to centre cut or you can use the triple banner punch. sponge edges with Sweet sugarplum adhere to card.
 Die cut your three small flowers in whisper white and sponge edges with Sweet sugar plum ink. Stamp succulent in old olive on garden green and cut out using framelits Dies. place on left side of banner, shape succulent flowers and layer up onto leaves. Your card is now complete.


your photo name

Ladies cable knit card

 Welcome everyone to my blog today.
I have a project that I would like to share with you today.
This is a ladies cable knit card inspired by a picture my sister found on Pinterest.


Here are the digits and stuff you need to complete this card as well as the numbers for ordering supplies.
You will find a link to my online shop above.

. Card stock Very Vanilla #106550

Emerald envy card stock # 3141420
1 @ 8 1/2 x 5 1/2 scored @ 4 1/4 inches
1@ 5 1/2 X 4 1/4"
1@ 5 1/2 X 3/4"
1@ 1" x 1/2

 Detailed details stamp set 143314
FREE  with $90 order from sale-a-bration catalogue
Versa mark ink #102283

Lace Doily # 142793

Cable knit embossing folder #143537

pearls  embellishments #119247

Enamel shapes in colour 2016-2018 # 141410
for buttons
  • Take your coloured card stock 5 1/2 x  4 1/4 and place in embossing folder and run through big shot 
  • Then with a pencil and ruler measure 1 inch from the sides of the 4 1/4 inch side and make a small mark, now measure down 1 1/2 inches from the centre and make another mark. These 3 marks form the markings for the neckline either round or V neck. For this card, we will be making a round neck. I used a 2" circle punch and placed it 3/4 of the way and punched out, then cut with scissors a smidge of each side to neaten.
  •  From the circle   piece that makes the neckline we will cut this down to make the pocket. Just lay the pocket over the right hand side cable, and match, cut off excess.
  • With your narrow pieces of cardstock using delicate details stamp set emboss your pieces with versa mark ink and embossing powder and heat set.
  • To give more depth to card I sponged with a dauber and matching ink.
  • Now we can start constructing card.
  • Place your doily at the bottom of the neckline and glue in place. You may need to trim your doily down
  • Place wider strip of cardstock to front of cardigan and trim to match neckline you can add your buttons.
  • Place your pocket in place lining up pattern and glue then, add narrow embossing to top of  card pocket.
  • Now glue to front of card and add your pearls or gems. 


  •                                                       
your photo name

Gift bag inspired by Perfume Bottle

Hello everyone,

Glad you could join me today.
This is my first post on my new blog and I thought that I would share with you a project I did late last year for my first post. I do hope you like it and I will add a video that goes with the instructions.
Some of you may have already viewed this on You Tube.


Here we go.

Cardstock/DSP 4 7/8" x 8"
Score long side @1/2", 1 3/4", 4 1/4" & 5 1/2"
Score short side @ 1/2" & 1 3/4"

Fold and burnish all score lines
Cut up all score lines to second scoreline and cut a small wedge on narrow sides and 1/2" side.
Remove first two squares and one along short tab.
Put tape or glue (Tombo) down narrow side and make box as usual. (refer to video)
Pinch top sides slightly together to close top of box.
Next cut out lots of labels (second one in from outer) place on scoreboard, find centre then score 3/8 e3ither side this creates fold lines for top.
Then using ruler and scoring tool big end, mark in scorelines on angels to create pattern (piercing mat underneath)
Cut a strip of foil/cardstock 3/8" x 6" adhere down centre of label cut out, mark scorelines either side then mark small indentations to create holes and buckle cut both ends of small strip outward v shape.
Cut 1 or two strips 3/8" x 6 score 3/4" either side adhere to  label for handle
Adhere folded top to one side of and use magnet closures for the other side.

FOR GIFT TAG LABEL:

Whisper white cardstock cut @ 1/2" X 1 1/2" Sentiment "FOR YOU" stamp set "Your so lovely"
DSP cut @ 6/8" x 1 6/8"
Stamp sentiment in versa mark and emboss in silver, flag end of both hand punch hole using 1/8 hand held punch.
Cut approximately 8" of bakers twine fold in half thread through from back to front of both two flagged pieces together form tag loop, tie on handle of bag in a bow.
Now your bag is complete.

I really hope you enjoy this project and have a go yourself.

Unfortunately I can no longer get these little perfume bottles as they were only available for a short time but you could use it for other items as well.

I also have step by step photos as well I could have added to post but as I am short of time at the moment the video tutorial should give you all the information that you need to complete this project.

Currently working on some larger ones as well and I will bring them to you as soon as I have them completed in the near future.

All items used in project are available in my online shop. Just click on the shop now button to purchase.
I will add numbers for items at a later date when I have more time or they may be in the description box below video. Just click on show more.

If you would like to join my awesome team just click on the join button and it will have all the information you need there or email me.

During the current Sale-a-bration promotion it is the best time to join as you get more bang for your buck plus you get a free gift from me as well.

All those that shop online or order with me receive a beautiful gift as well. So please do drop in and explore both my blog and the links to my website.

Any questions just drop me an email and I will respond as soon as I can usualy within 24 hours.


your photo name